You will need
MH-ET LIVE ESP32 MiniKit
Micro USB cable
Connecting the components
Connect the MH-ET to your computer's USB port via the micro USB cable. A solid red light should appear on the board.
Setting up your development environment
Now that the board is connected, let's get the development environment set up:
Arduino IDE
Install the Arduino IDE (Integrated development environment). You can download it for Mac OS X, Windows and Linux here.
Detailed instructions can be found below:
Installing the board definitions
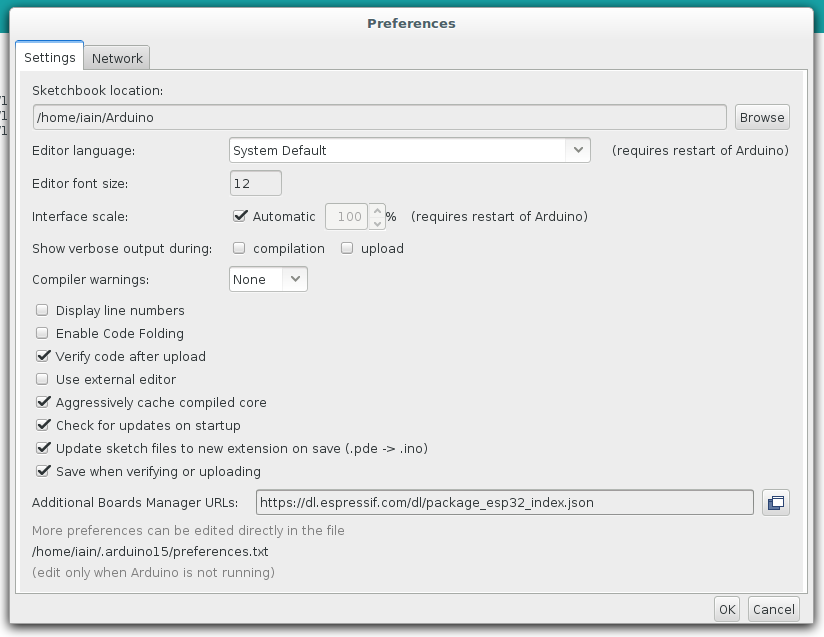
Start the Arduino application and open
PreferencesEnter
https://dl.espressif.com/dl/package_esp32_index.jsoninto theAdditional Board Manager URLsfield. If you need more than one, they can be separated with commas
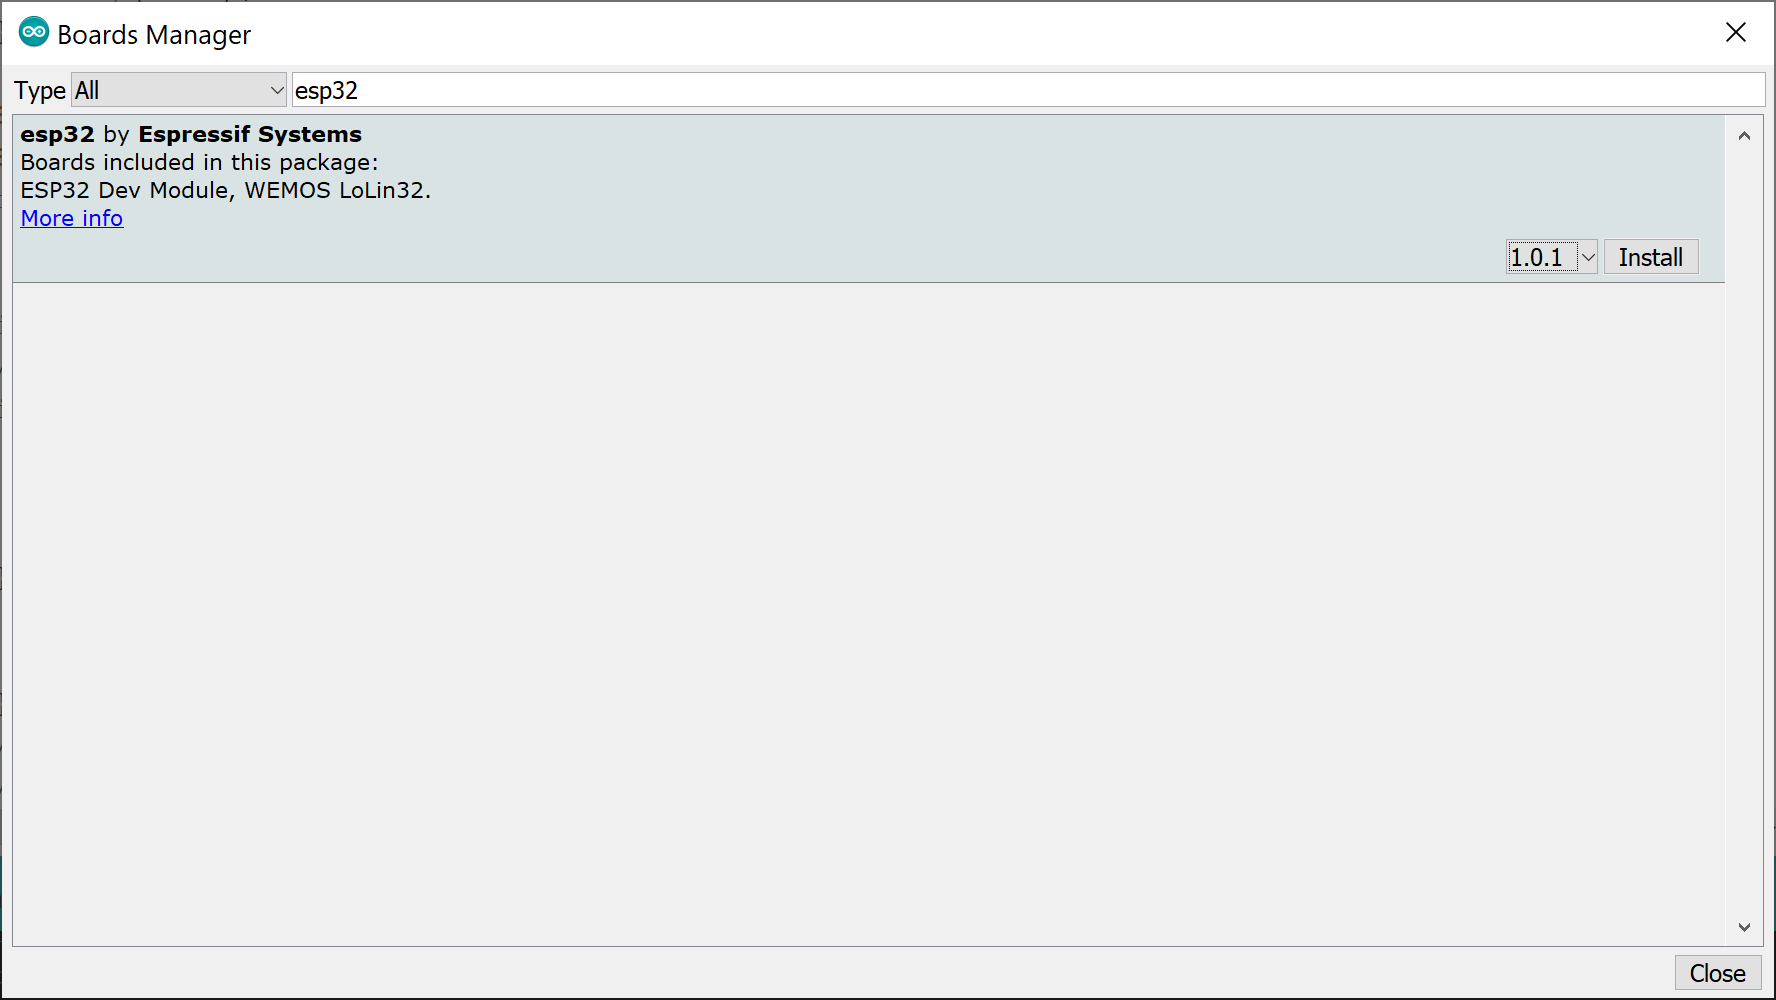
Go to
Tools > Board > Boards ManagerSearch for
esp32.When found, select version
1.0.1and clickInstall
Our sketches do not compile successfully with ESP32 Board libraries higher than 1.0.1. Therefore it is recommended to use 1.0.1.
Selecting the board and port
Select your board type by going to
Tools > Board, then selectingMH ET LIVE ESP32MiniKit(you may have to scroll down the list to find it)Check that
Tools > Upload Speedis set to115200
Next, you'll need to select the port under
Tools > Port. Your port name should be something similar to the below:On Mac OS: /dev/tty.usb.modem8232 or /dev/cu.SLAB_USB_toUART
On Windows: Com4 or Com3
On Linux: /dev/ttyUSB0 or /dev/ttyACM0
If your port is not showing up or Port is greyed out, the first thing you should check is that the micro USB cable you're using is NOT a charge-only cable, and that it isn't faulty. If your cable is working and supports data, but the port is still not showing, you probably need to install USB to UART Bridge VCP drivers on your computer. Click here, then download and install the drivers for your operating system. After installing the drivers, restart the Arduino IDE.
Note for Mac users
You may need to install the driver twice for it to work, as the first install will just remove the existing driver.
Connecting to the Wia platform
Now that you're all set up, the next step is to start sending data to the Wia platform, where you can do smart things with it!
What is Wia?
Wia is an IoT cloud platform for building things and bringing them online. Once your data is coming into the Wia platform, you can set up triggers, speak with other services, configure logic and call actions, all using Wia's real-time IoT rules engine.
Getting started with Wia
Getting set up with Wia is easy. Simply go to https://www.wia.io/signup and create an account. Once your account is created, you'll be directed to the Wia Dashboard, where you'll create your first Space. Spaces are a safe, secure place where your Devices live. Give your Space any name you like.

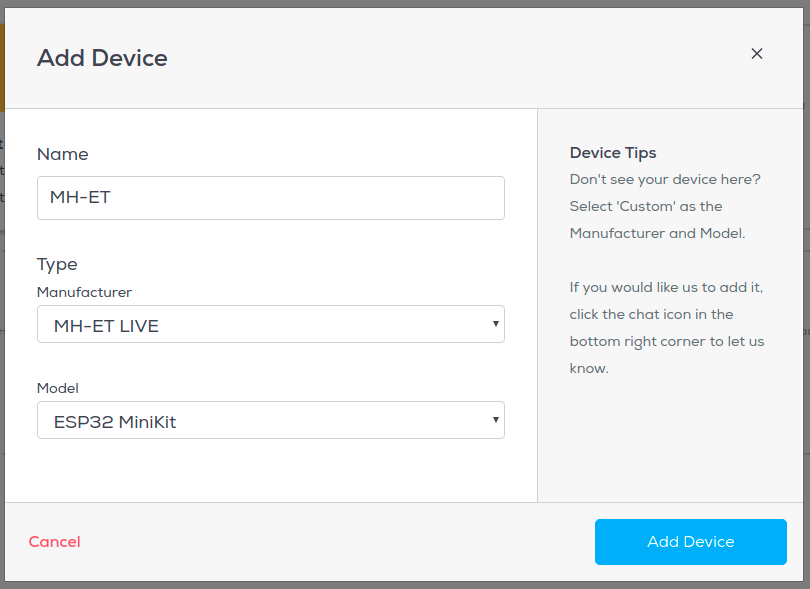
Next, you'll need to add a Device to your Space. Give your Device a name, select the manufacturer and model, and hit Add Device. The Device is now ready to receive data.
Creating the Sketch
So how can we send data to Wia? We simply connect the board to a WiFi network, and make a request to Wia's REST API. The below sketch is all you need to start publishing data to your Wia dashboard.
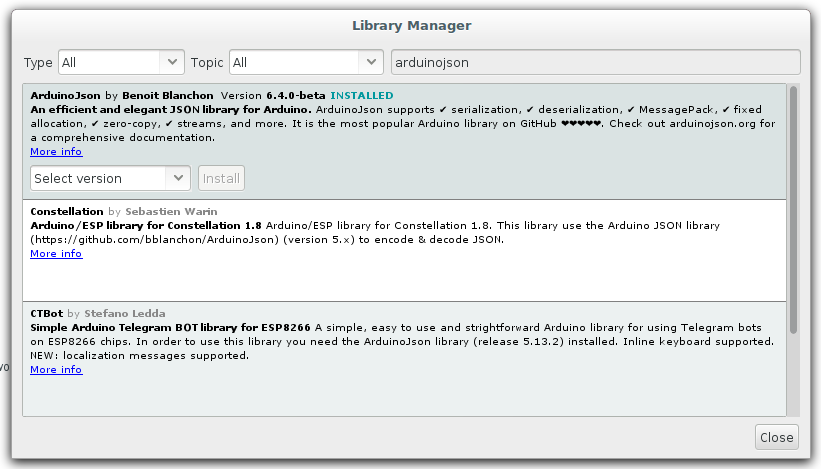
The above sketch uses a couple of new libraries that need to be installed:
ArduinoHttpClient
ArduinoJson
These libraries can be installed within the Arduino IDE. Simply go to Sketch > Include library > Manage libraries. Search for the libraries by name, then select and install them.
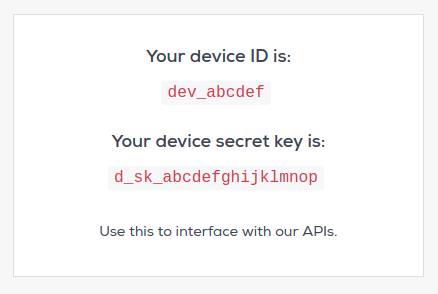
Next, you'll need to replace the values of the following variables in the code (at the top):
ssid- with your WiFi network namepassword- with your WiFi network passworddevice_secret_keywith your Device secret key from the Wia Dashboard (the one that begins withd_sk). You'll find this under theConfigurationtab of your Device
Uploading the sketch to your MH-ET
Upload the sketch by clicking Sketch > Upload. You'll be prompted to save the sketch before it can be uploaded. Once it has finished uploading, you can go to Tools > Serial Monitor. Make sure the baud rate (bottom right) is set to 115200. Here you can monitor the board connecting to the network and sending data. The MH-ET's blue LED will light up when it has connected to the WiFi network.
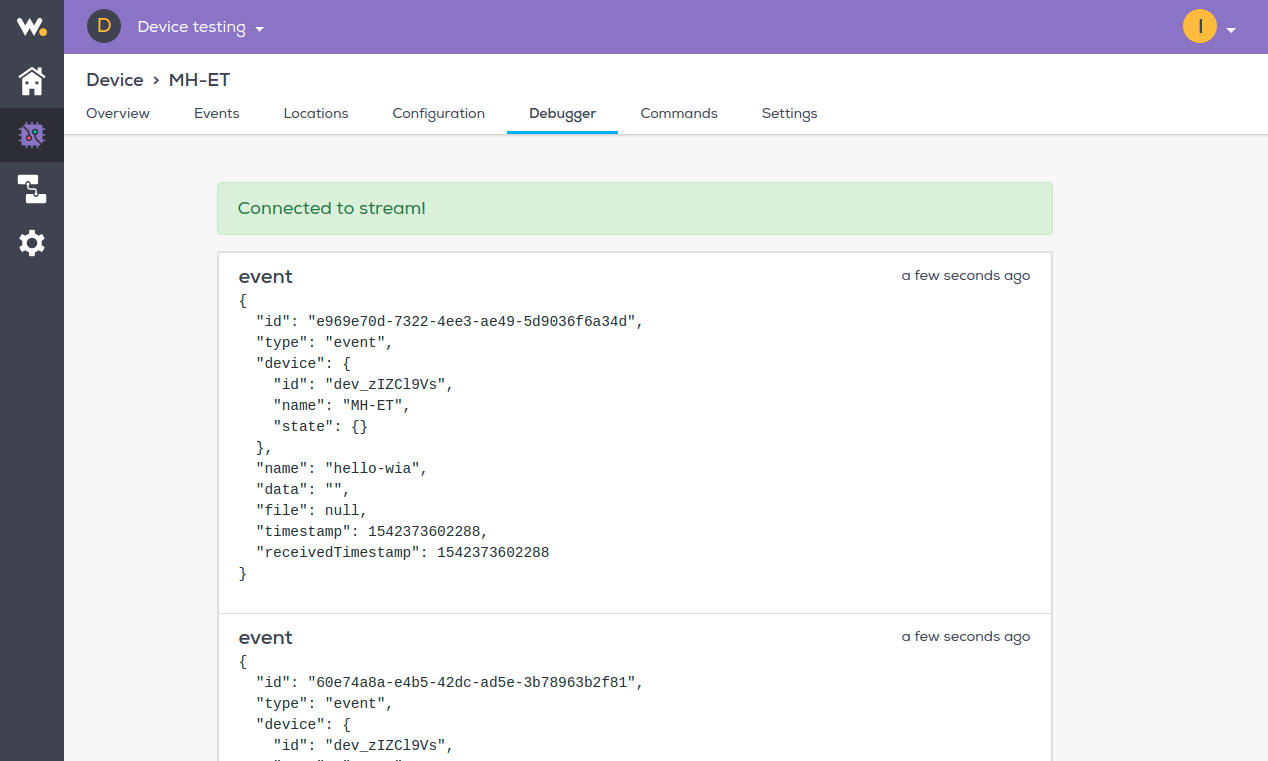
Back in your Wia dashboard, go to the Debugger tab for your Device, and you should see an Event coming in every 5 seconds.