Setup Your Development Environment
We'll be using Atom as our development environment. You can download the latest version from here.
Once you've got it setup, install the Pymakr plugin. Follow the steps in this tutorial to get it setup.
Connect to the Board
There are two ways to connect your board to your computer either via USB or Serial connection.
(Option 1) Via USB
You can do so either via the USB port on the Expansion Board, Pysense or Pytrack boards (more on that here).
(Option 2) Via Serial (USB to TTL)
To communicate with the board via a USB to TTL cable, connect the following pins:
| WiPy | USB TTL |
|---|---|
| GND | GND |
| TX0 | RX |
| RX0 | TX |
| 3.3V | VCC |

Get Device Name
Once you've got it connected to your computer, get the name of your device using one of the following steps:
Linux and Mac OS X
- Download and install the FTDI drivers from here. Select the appropriate version for your operating system and architecture.
- Open a terminal window and run the command
ls /dev/tty* - Look for a device with the name that begins with
/dev/ttye.g./dev/tty.usbmodemPy343431on MAC or/dev/ttyUSB0/dev/ttyACM0on Linux.
For Linux, you may need to run the two commands below. Once you've completed that, reboot your computer. This will add permissions that will allow you to upload a sketch to the board.
sudo usermod -a -G tty ${USER}
sudo usermod -a -G dialout ${USER}
Windows
- Download and install the FTDI drivers from here. Select the appropriate version for your operating system and architecture.
- Open the Windows start menu and search for
Device Manager - The COM port for the Pycom device will be listed as
USB Serial Deviceor something similar - Keep note of the COM port (e.g. COM4)
Pytrack and Pysense will work out of the box for Windows 8/10/+, Mac OS as well as Linux. If using Windows 7, drivers to support the boards will need to be installed. You can find them here .
Setup Your Project
- Create a new folder for your project. Let's call it
wia-publish-pycom-event. Remember where you put it. - In Atom, go to
File > New Windowto open a new window. - Add your newly created folder by clicking
File > Add Project Folderand navigating to the folder made previously.
In the top menu in Atom, click on View > Toggle Tree View. This should make it appear.
- If the Pymakr plugin is not open at the bottom of your Atom window, click on the arrow on the right hand side to open it.
- Select
Settings > ProjectSettings. In theaddressfield replace the value with the device name from the step above e.g./dev/tty.usbmodemPy343431(Linux/Mac OS X),COM4(Windows) then save the file.
Add the Request Library
- Right click on the folder name in Atom and click Add Folder. Enter
libas the folder name. - Right click on the
libfolder and click New File. Enterurequests.pyas the file name. - Click on the file then copy and paste the code from here into that file then save it.
Publish An Event
- In Atom, right click on your project and click New File. Enter
boot.pyas the filename. - Copy and paste the code below into the file. View here on GitHub.
xxxxxxxxxxfrom machine import UARTimport machineimport os uart = UART(0, baudrate=115200)os.dupterm(uart) machine.main('main.py')- Right click on your project and click New File. Enter
main.pyas the filename. - Copy and paste the code below into the file. View here on GitHub.
xxxxxxxxxxfrom network import WLANimport urequests as requestsimport machineimport timeimport pycomimport gcimport micropython # Garbage collection to save memorygc.enable() # Your WiFi network credentialsWIFI_SSID = 'your-wifi-ssid'WIFI_KEY = 'your-wifi-key' # Get this from the Wia dashboardDEVICE_SECRET_KEY = 'your-device-secret-key' # Delay between each eventDELAY = 3 wlan = WLAN(mode=WLAN.STA)nets = wlan.scan() # Connect to the WiFi networkfor net in nets: if net.ssid == WIFI_SSID: print('Network found!') wlan.connect(net.ssid, auth=(net.sec, WIFI_KEY), timeout=5000) print('Connecting...') while not wlan.isconnected(): machine.idle() # save power while waiting print('WLAN connection succeeded!') break # Post an Event to the Wia clouddef post_event(json): try: if json is not None: req = requests.post(url=url, headers=headers, json=json_data) if req.status_code is not 200: machine.reset() else: print("posting", json, "to Wia") return req.json() else: pass except: pass # Dataname = "hello-wia"json_data = {"name": name, "data": ""} # Run this loop continuouslywhile True: gc.collect() #micropython.mem_info() post_event(json_data) if not wlan.isconnected(): wlan.connect(net.ssid, auth=(net.sec, WIFI_KEY), timeout=5000) print("reconnecting...") while not wlan.isconnected(): machine.idle() time.sleep(DELAY)Replace the following values of the following variables:
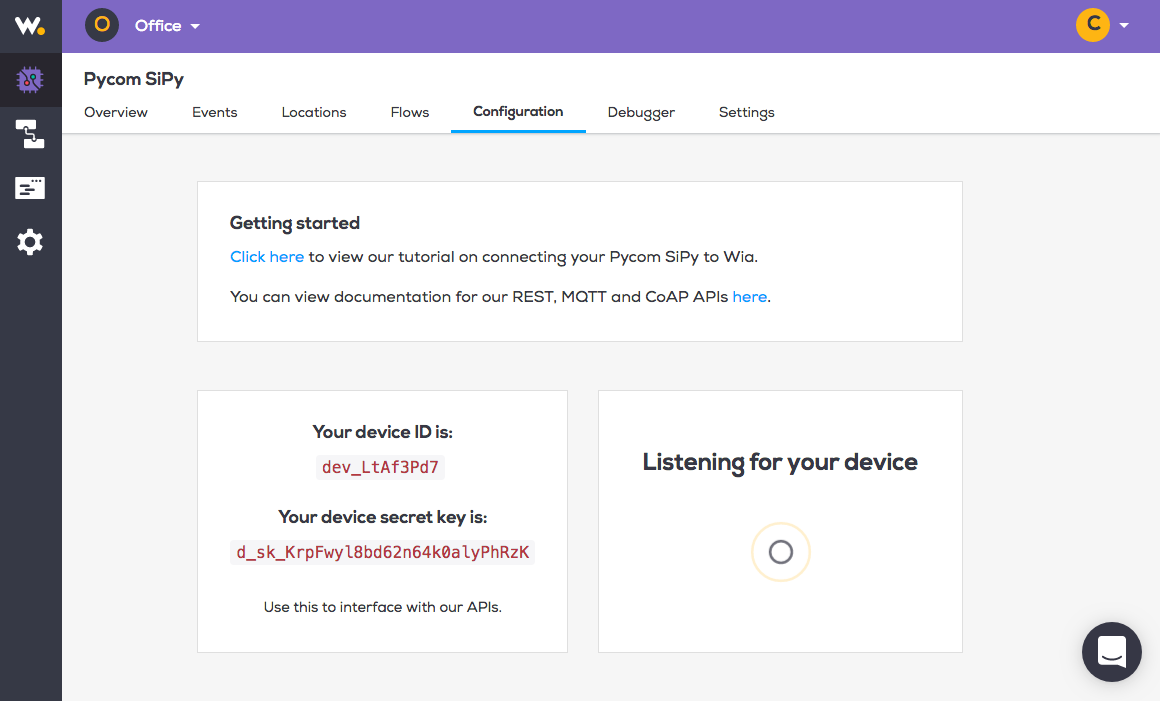
WIFI_SSIDwith your WiFi network name.WIFI_KEYwith your WiFi network password.DEVICE_SECRET_KEYwith your device secret key. You can find this in your Device Configuration page (see screenshot below).
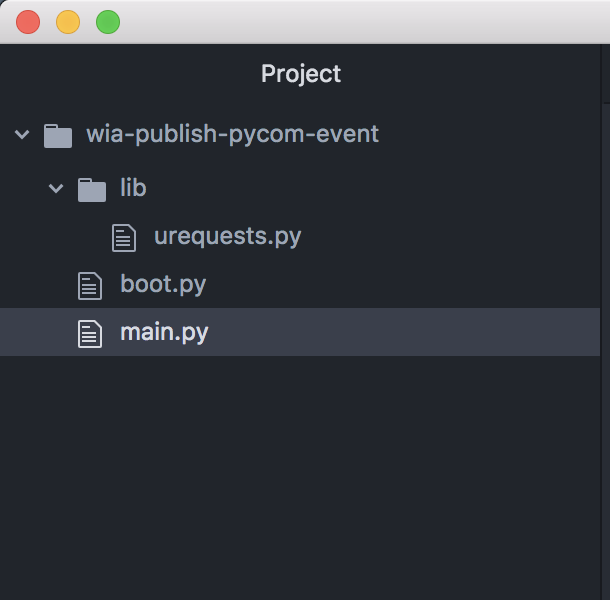
Your folder structure should now look like this:
liburequests.pyboot.pymain.py
Click Upload in the Pymakr plugin at the bottom of your window in Atom and send the code to your Pycom board.
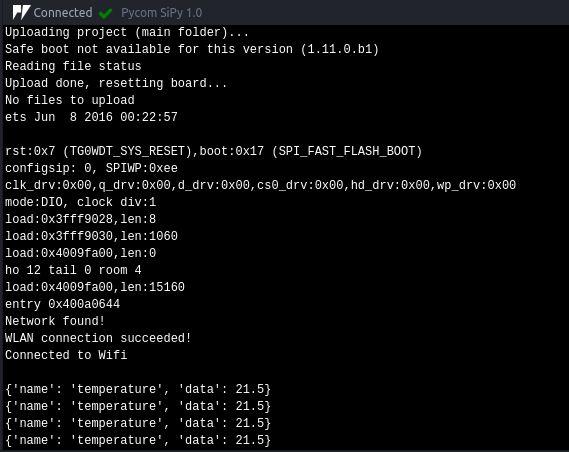
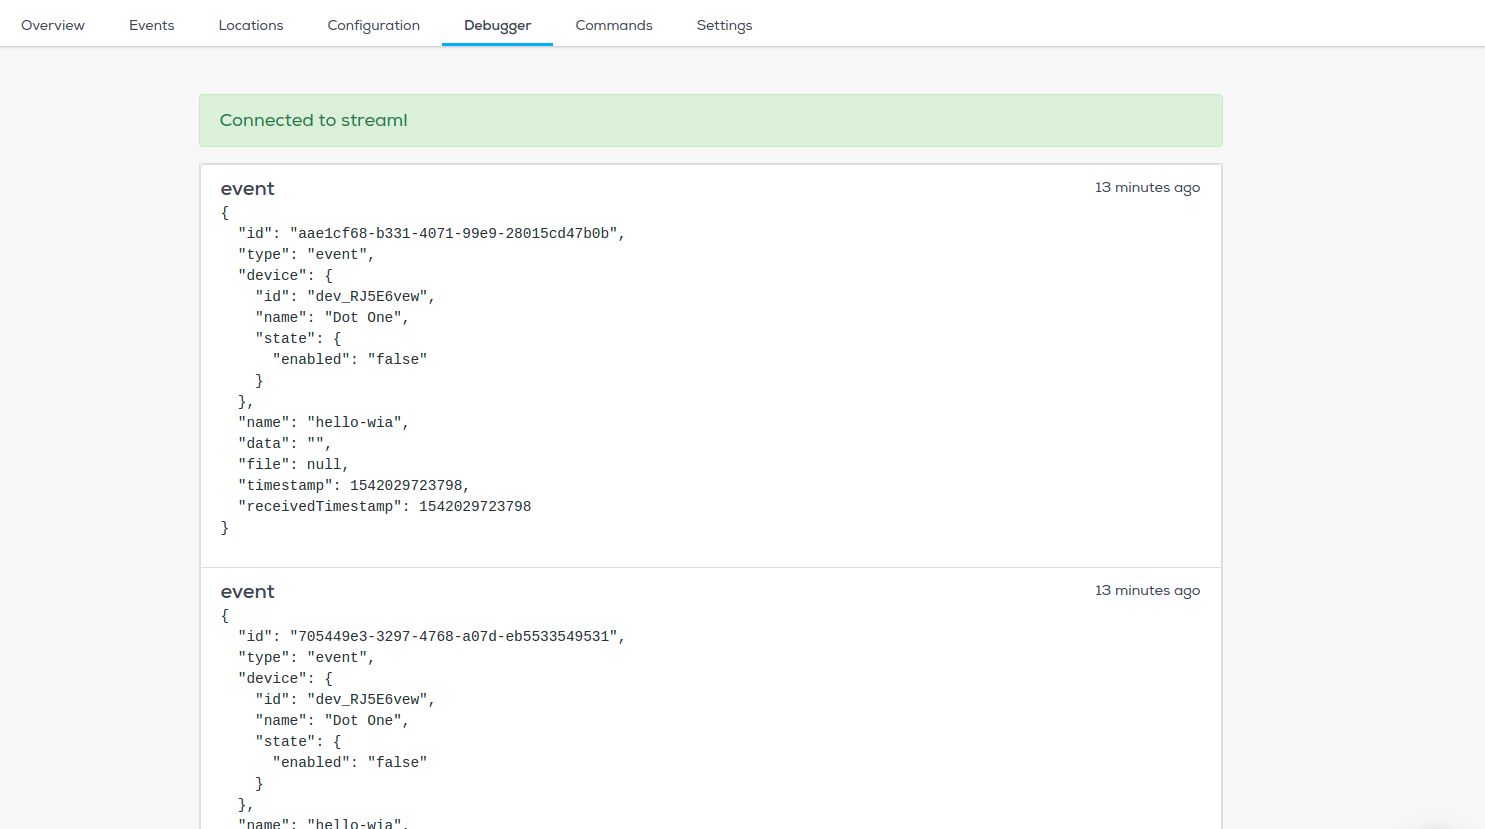
Now go to your device in the Wia dashboard and you should see the data appearing in the debugger.